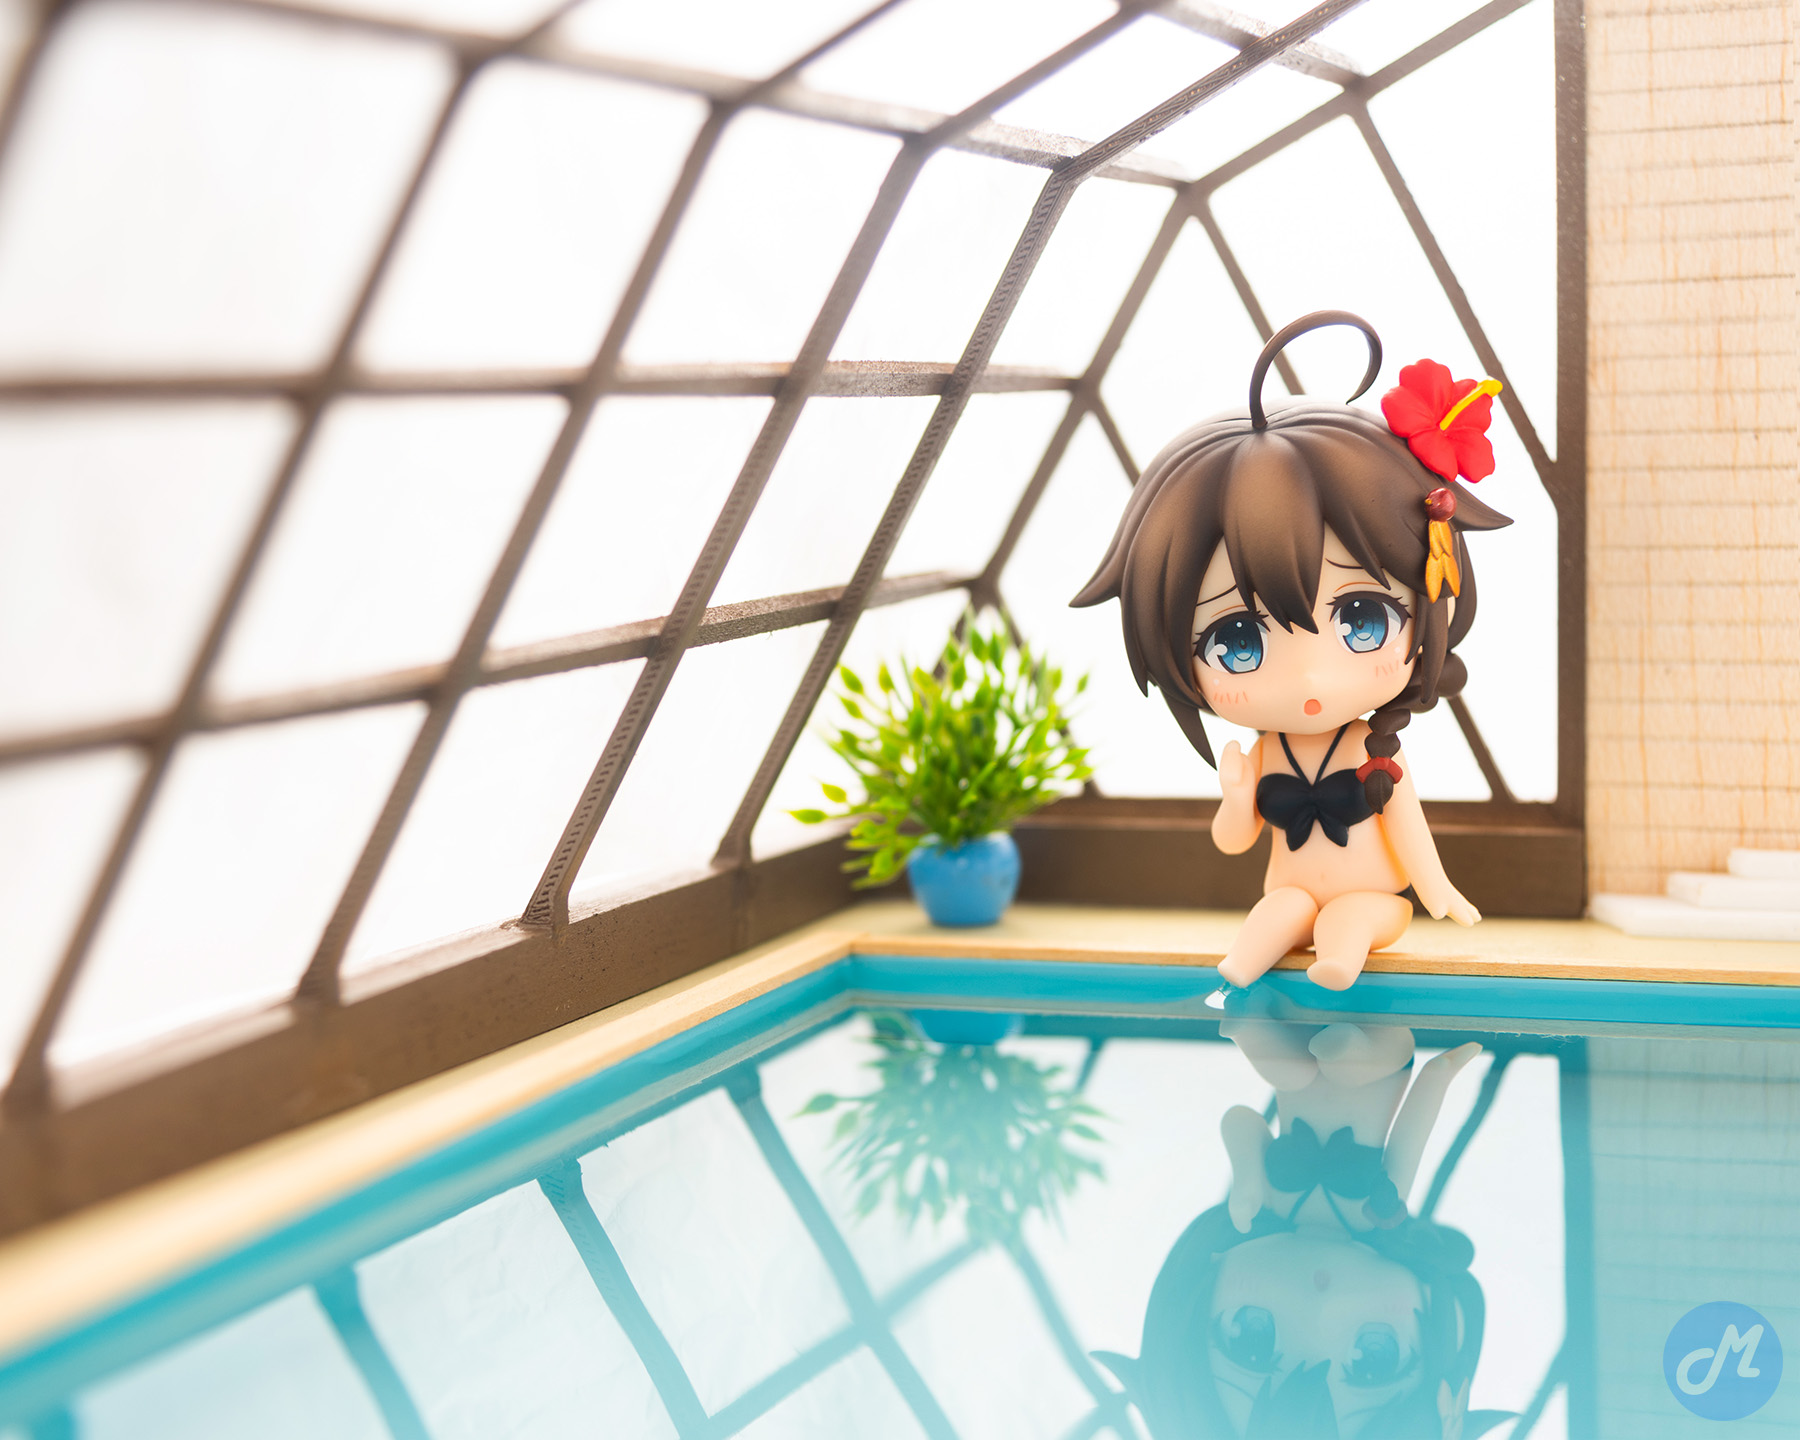
Join me in the pool?
The place looks familiar, I can’t put my finger on it.
Now before we dive into the details of this photo – I would like to request for your kind help to support my work by following my Instagram account at moenessphotos
Also if you prefer video, here’s one for you. The video content covers more than this article here so you might want to give it a watch if you’re interested in the more technical aspects of the workflow.
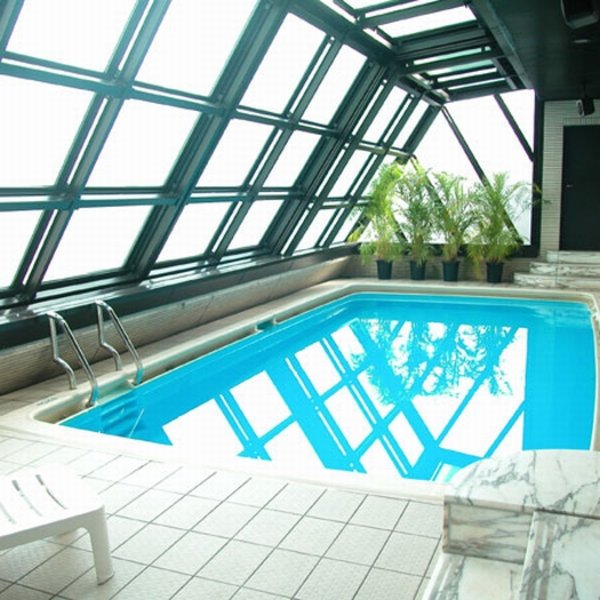
Familiar? Some of you actually KNOW this pool. ( ͡° ͜ʖ ͡°) This is the reference, the infamous pool from Japan.
The following are the components used in this project.
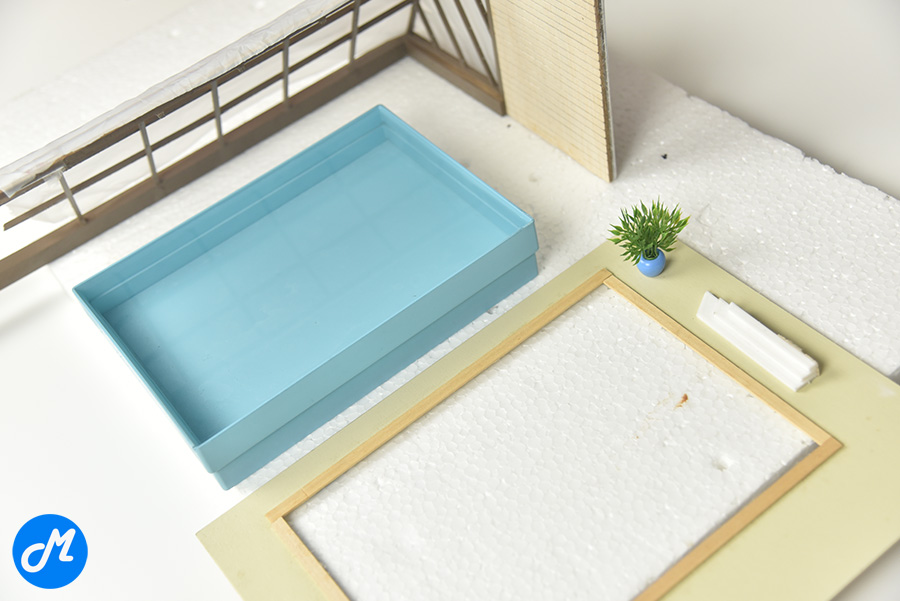
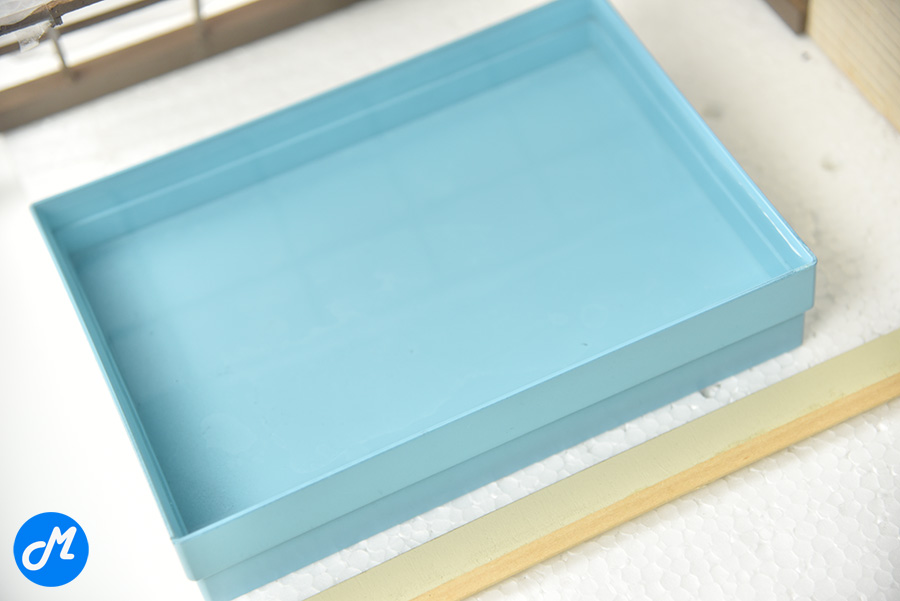
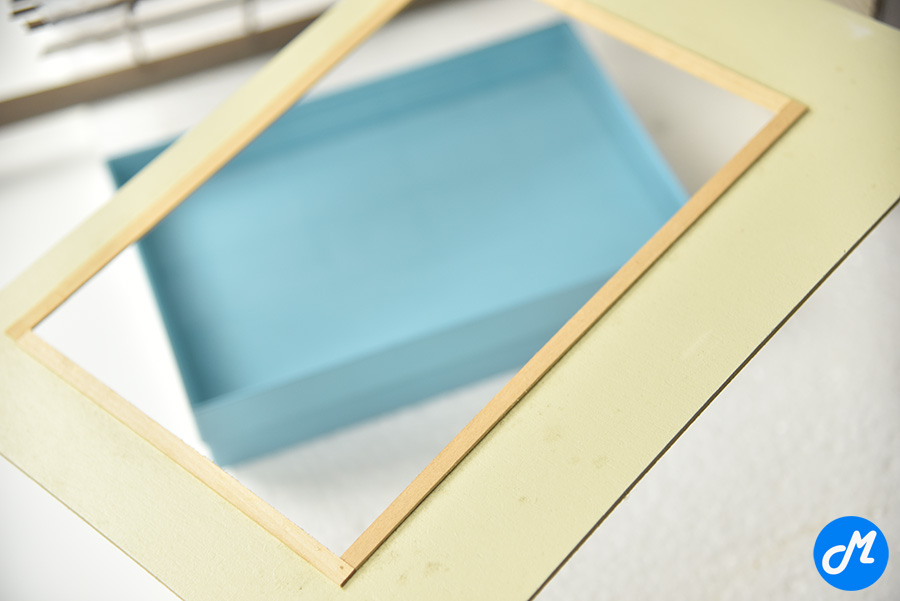
Let’s start with the base which is one of the 2 key elements of the image, this is a plastic try painted in blue to serve as the pool.
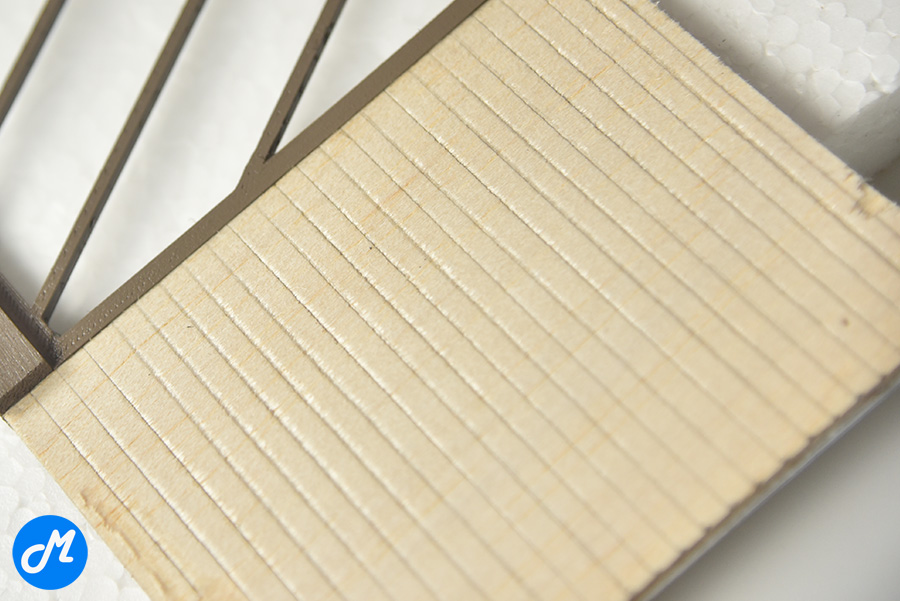
Next we have this part which is the floor around the pool, a wooden board cut out and having additional smaller wood glued to the cut-out that serves as the mounting point and also the edge of the pool.
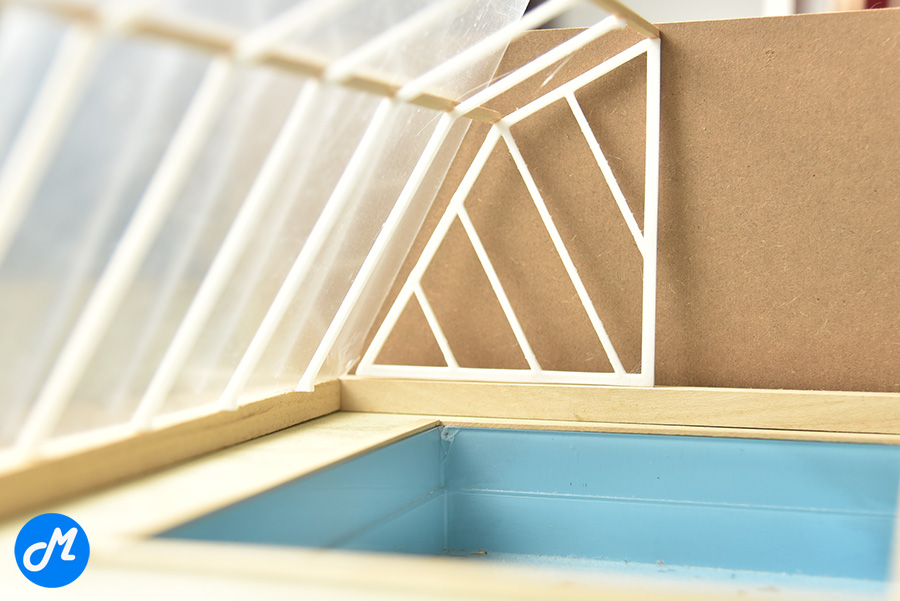
And then there’s the signature window, this is what it looks like painted and with soft translucent paper on it.
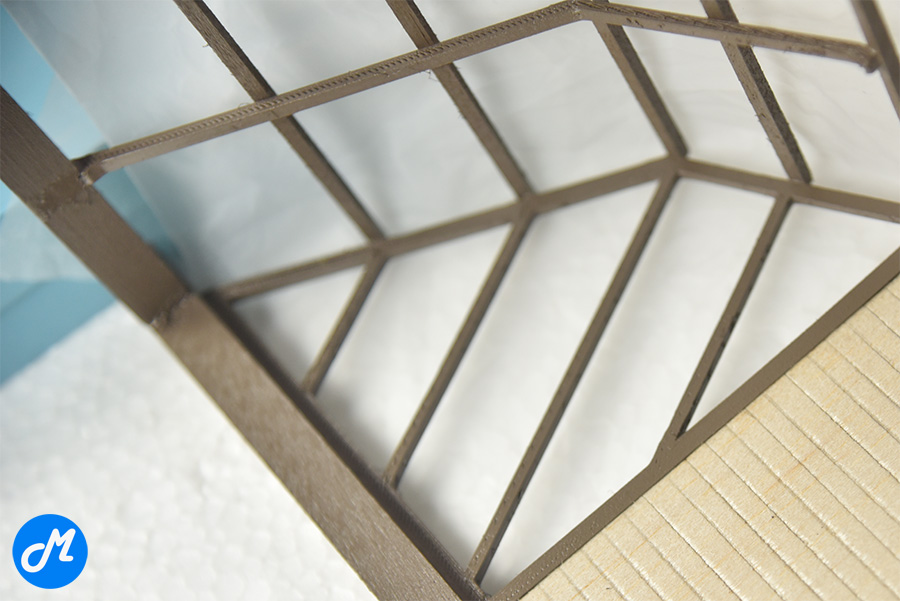
The Window is made up of 3D printed vertical frames that are held in place by wooden horizontal frames. This is the preliminary photo to ensure the frame is appearing as it should, at least based on my idea.
For the wall panel it’s a thin piece of plywood, I used a sharp pencil and draw the lines across.
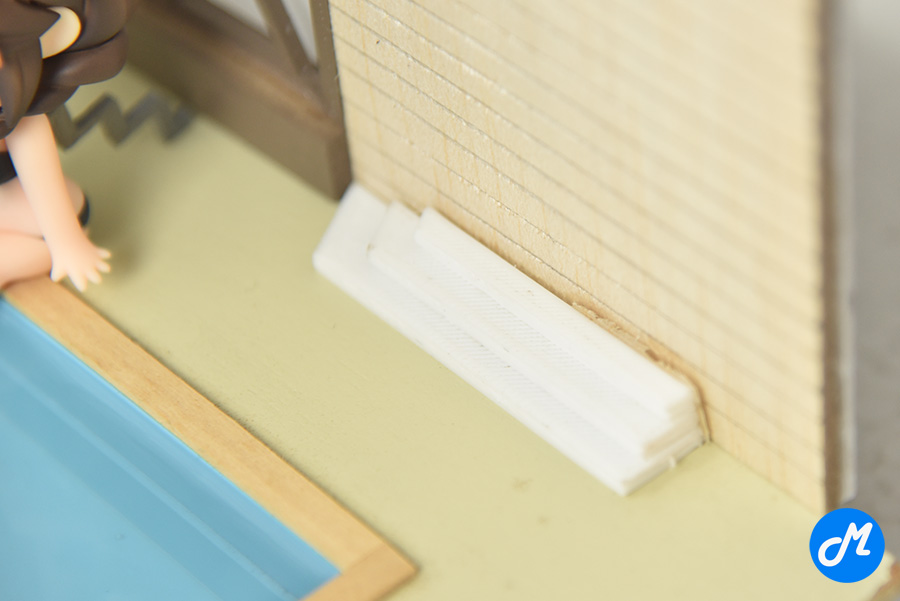
As for the steps, they’re 3D printed and glued together though one could just use styrofoam board for this. I used 3D print to get the output consistent and of the height I wanted as styrofoam boards are thicker.
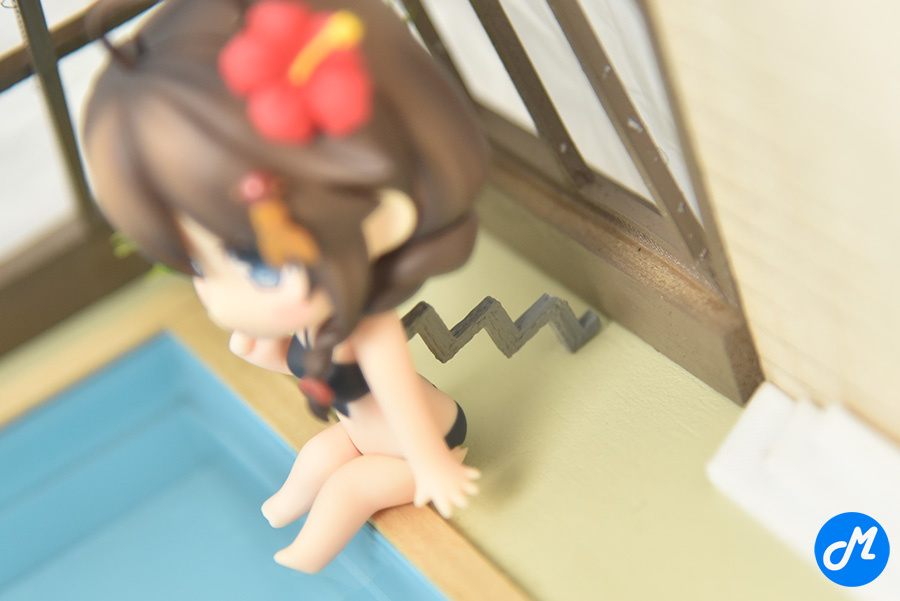
This is how Shigure is held in place, I used some random old piece of 3D printed material and crafted it to be sufficient to support her.
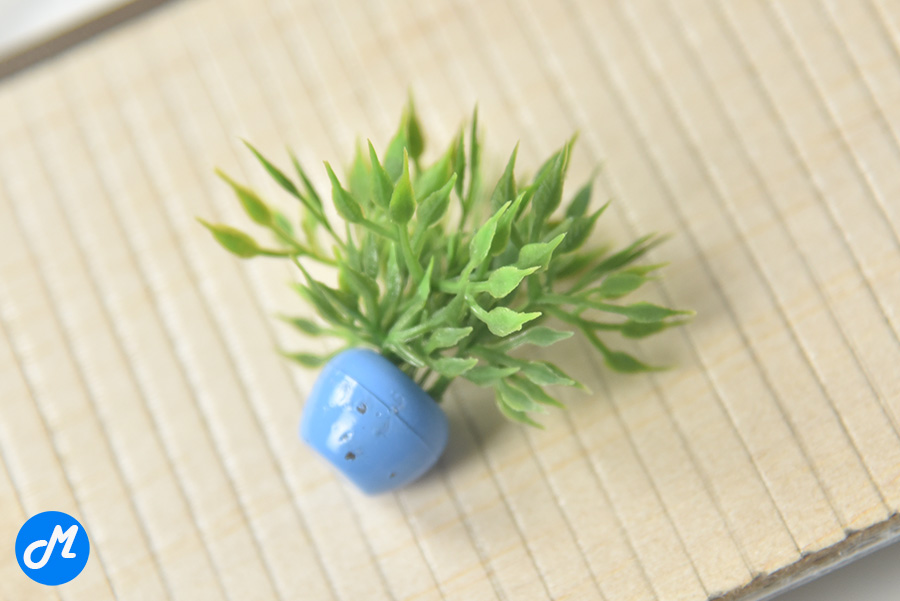
As for the pot of plant, the bot is from my collection while the plant is …… well part of my collection, taken from fake plants that one places in aquariums.
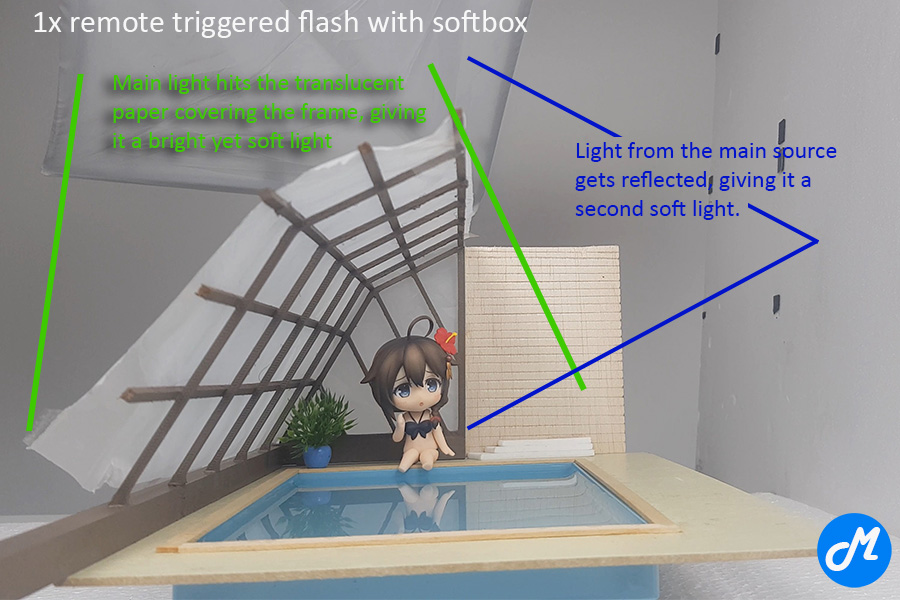
Here’s the view from the side, you see that the floor is elevated by the plastic container which is thepool
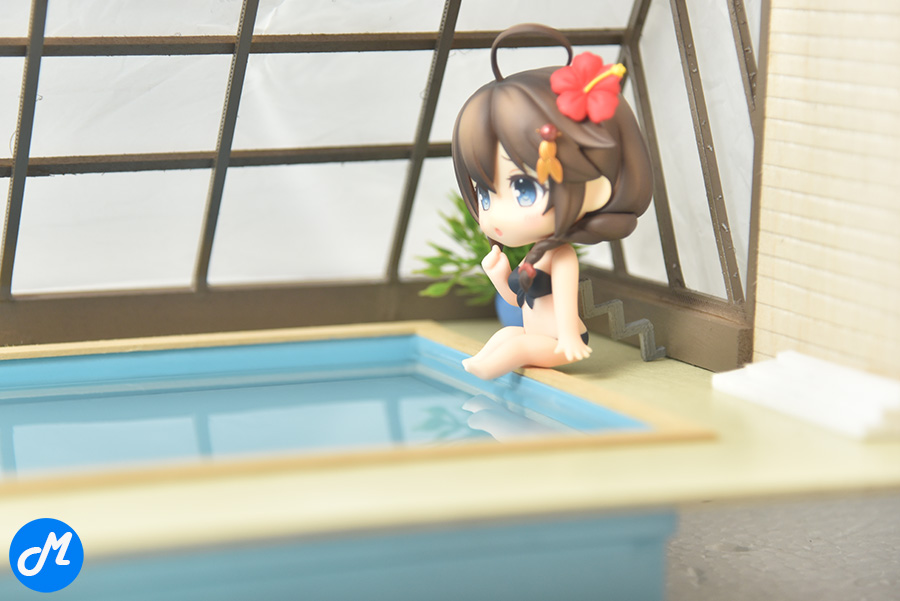
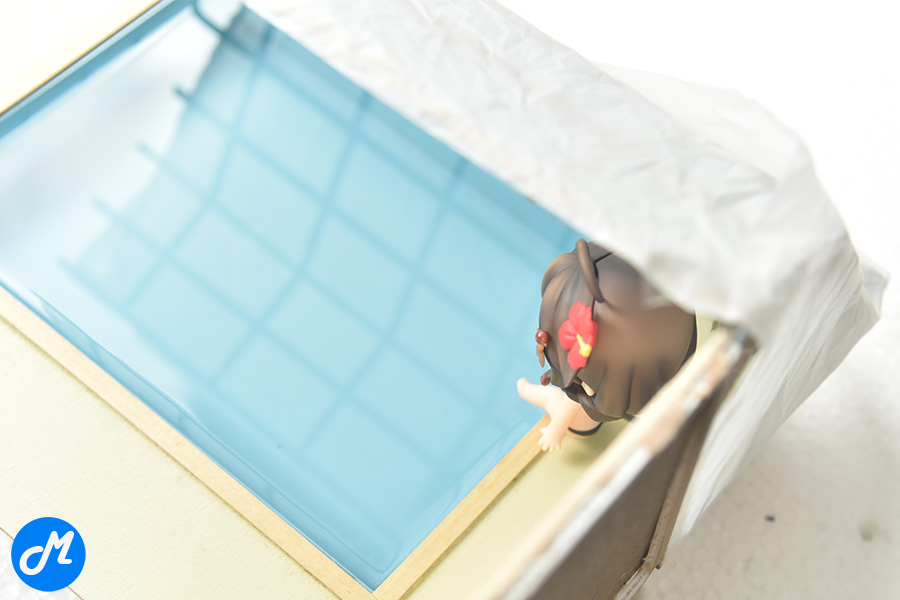
Here’s how the translucent paper cover the frame, and as you can see the water is still and reflects the scene.
Lastly this is how the lighting is done – 1x flash unit at the back that hits at the translucent paper, and also having the light bounce off the reflector on the right.
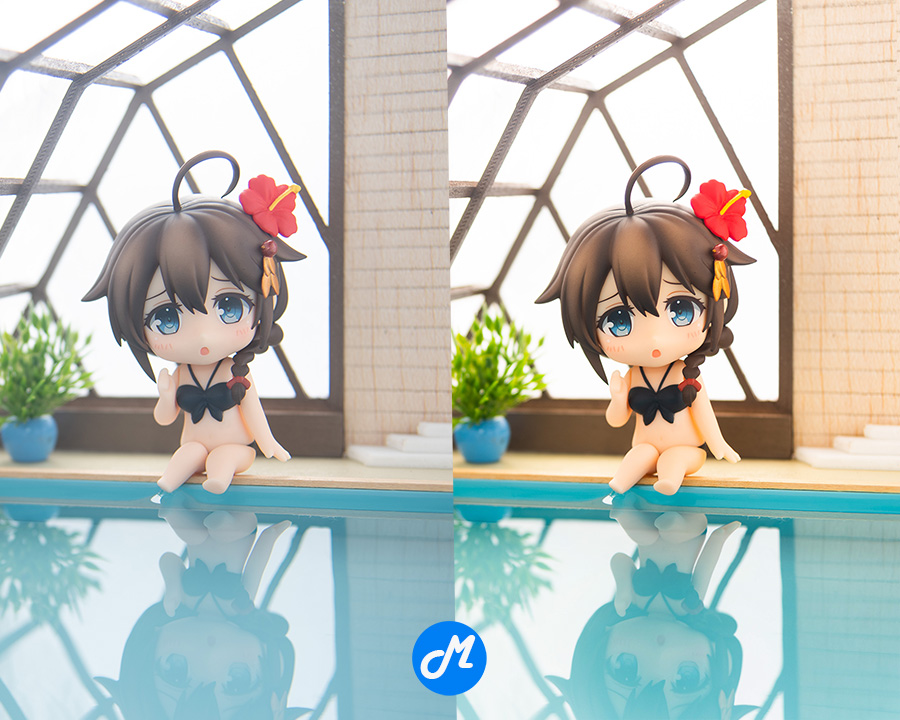
I usually do not do much post processing but for this one it had to be due due to the limitation of the setup.
When bright light is introduced in this sort of setup it does make things look washed out. I am able to tune contrast and everything else within the camera but that will only improve the areas I like but destroy (literally) the other areas.
In this image I had to use Photoshop to remove Chromatic Aberration, after that it’s a fine-tune of the colors to make the colors look better, basically richer colors without killing the scene.
After that I also enhanced the reflection in the pool and fix anomalies that appear on the window.
And that is how it’s done.
Thank you for reading.