This will be my longest ever article for a figurine photo, I will be elaborating on what went on behind the scenes from the thought process, to the works and down to the final image.
This Asuka figure isn’t one that’s released recently. Her first release was back in 2014 and she is a Prize Figure, click here for the product details on MyFigureCollection.
Acquisition
I didn’t know the existence of this figure, just as I don’t know the existence of many others because there’s really too many to follow. I chanced upon her when I was in Taiwan (I’m from Malaysia) on a business trip back in August last year (2017). If you remember my Drone x Nendoroid photo, I took that photo in Taiwan and it was on that same trip that I bought Asuka, just a few hours short from my flight home.
Why did I buy her? I love the appearance, the figure looks quite good for a Prize Figure and most importantly her face doesn’t look awkward, at least not in my eyes. Another key factor would be that I had concepts appearing the moment I laid eyes on her, and that is also the key factor for me to decide on almost every one of my purchase.
Concepts and Ideas
The initial concept of her diorama was of a bedroom, I’ve even bought parts and materials for her room setup. The idea came about in September itself but somehow I didn’t manage to get it up and running, with many reasons. One being work which is why I went on a hiatus for more than half a year, with just an occasional content here and there.
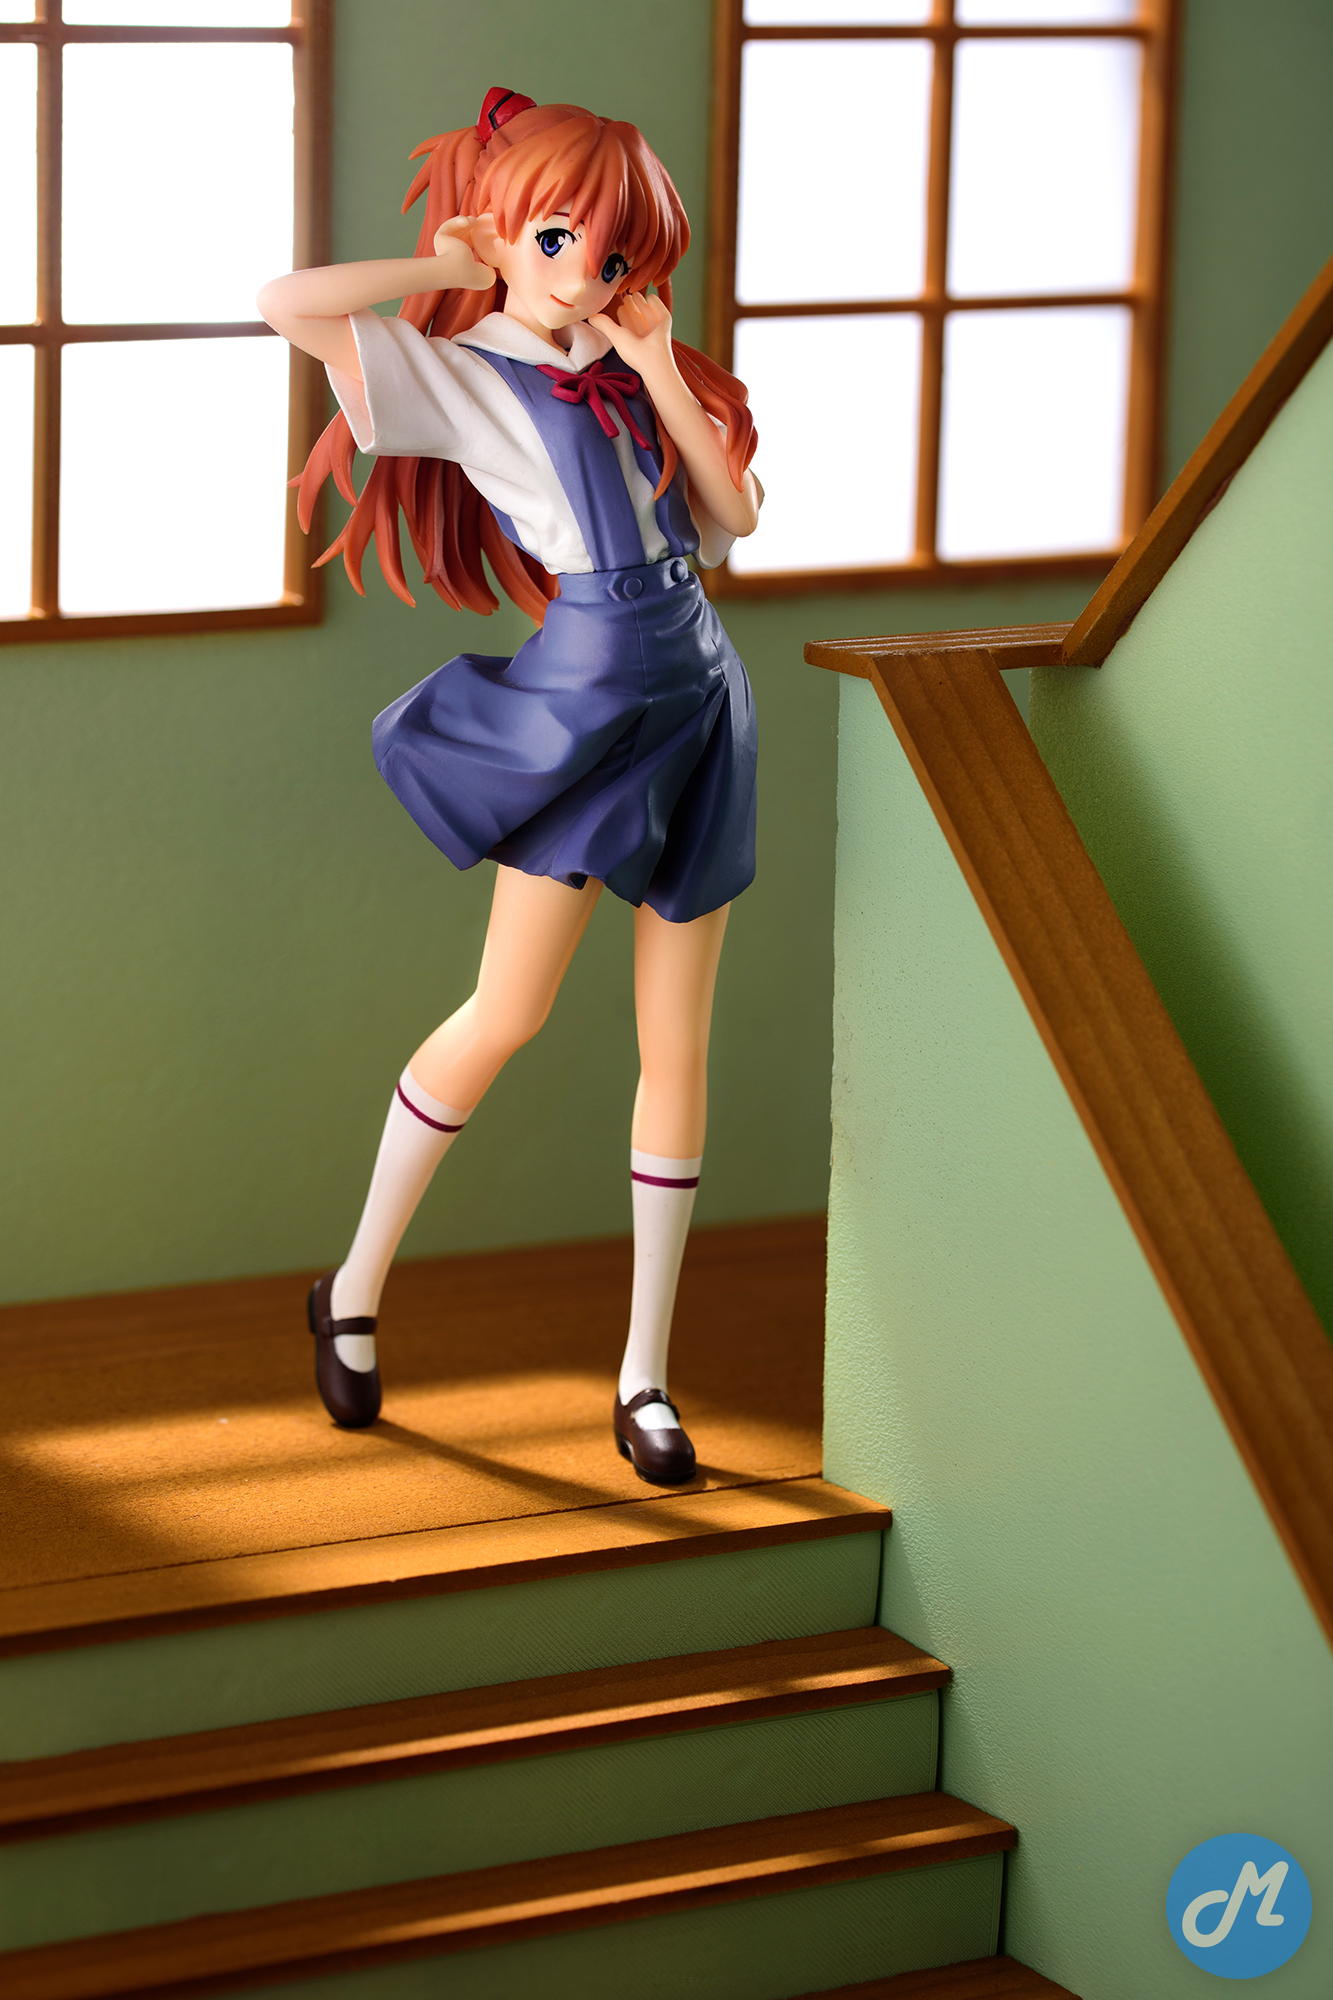
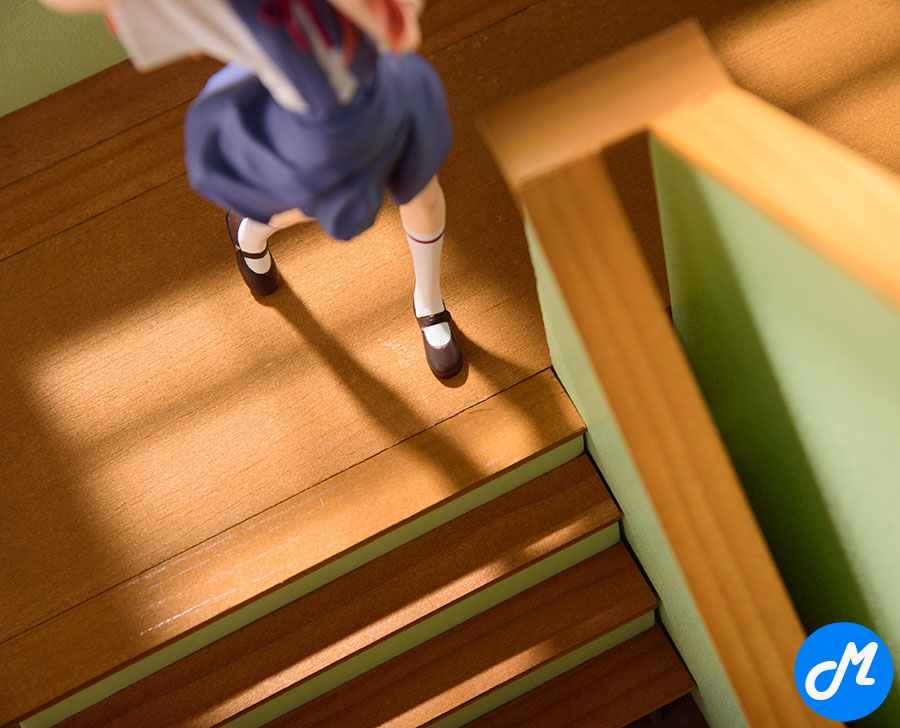
The 2nd concept which is the one seen here came about around April this year. The idea behind it is to imagine one looking at their crush in school, sounds cheesy but that’s the feeling I attempt to get across – imagine having your heart melted by the sweet smile, the flowing hair, the swaying skirt and the cheerful atmosphere. 😀
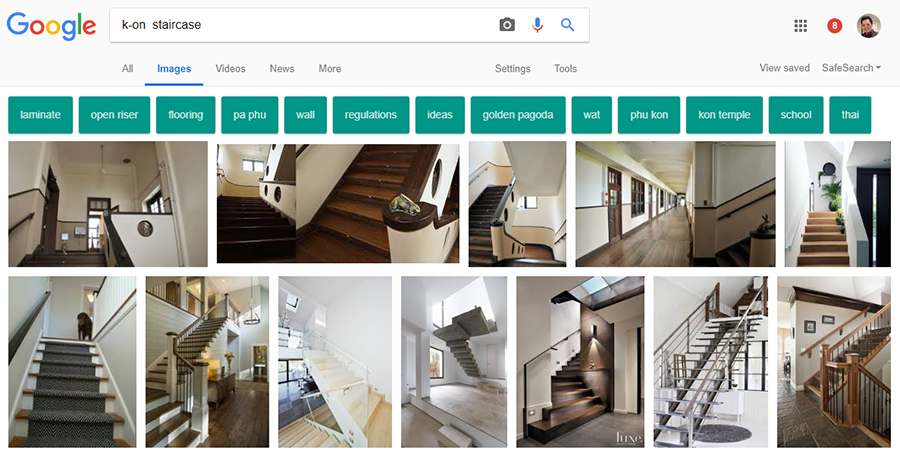
I started off by doing a Google Search of what school stair cases look like in Japan. References were images found on Google, and also scenes like those from K-On.
Production
Getting the idea is easy, the tough part is getting the diorama done as unlike most diorama you’ve seen thus far, this diorama is VERTICAL – meaning that the figure is standing on an elevated platform and that means the base of which she’s standing on has to be sturdy.
To make things a little more complex, Asuka here is not a small figure. Many prize figures like those from Banpresto, or even more detailed scale figures are often 1/7 scale with the height being around 17cm. Asuka here should be around 1/6 scale and her height is 21cm, that means overall she’s 20% larger than the 1/7 models and this translates to a much bigger diorama.
The design phase took quite some time as I had to plan the setup to make it realistic, matching her 157cm height based on the data available of her. This means actually taking measurements or at least estimate the height of steps, the height of the hand rail, and areas to allocate for the platform so the diorama looks as realistic as possible.
With the challenge in mind, going with my usual wood-based could work but I will have issues with structure accuracy and stability, fortunately I have a 3D printer in my lab. 🙂 I run more than one projects, I run a tech publication called goldfries (Youtube | Facebook)
The 3D Printer was used to form the structure for the staircase and the platform, the pieces were printed separately and then fixed together with high strength construction adhesive material. This process took countless hours as each print takes time and we’re looking at more than 10 pieces of various designs and having to piece them together to form as solid structure.
Note also that before I can print anything I had to design, that involves calculations based on measurements, and making revisions on the blueprint to rectify any form of miscalculation.
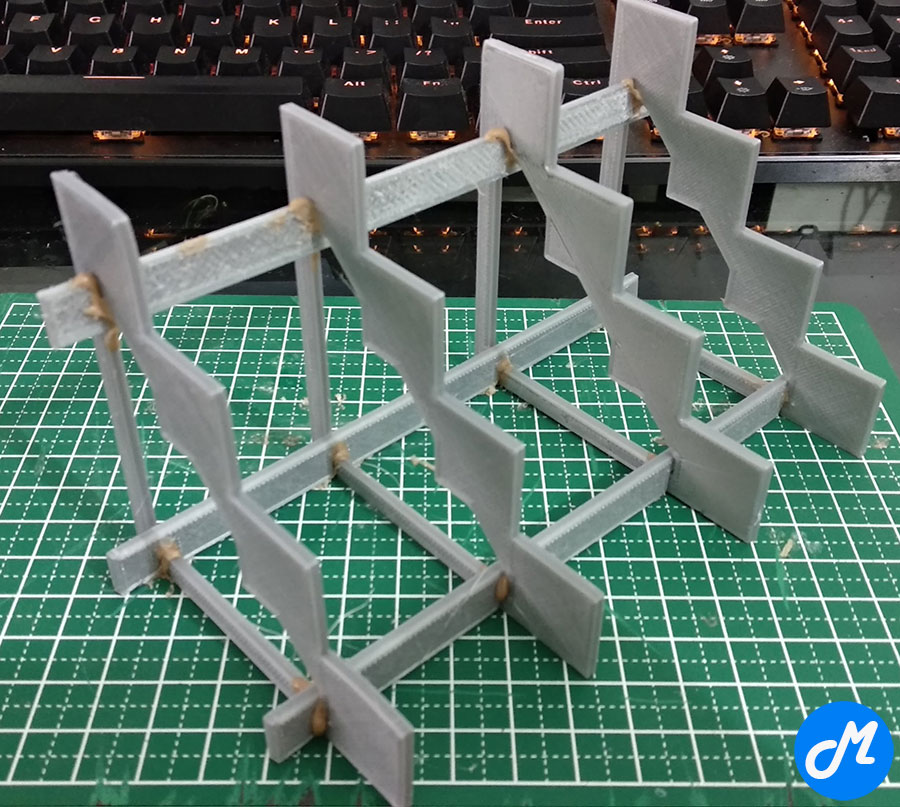
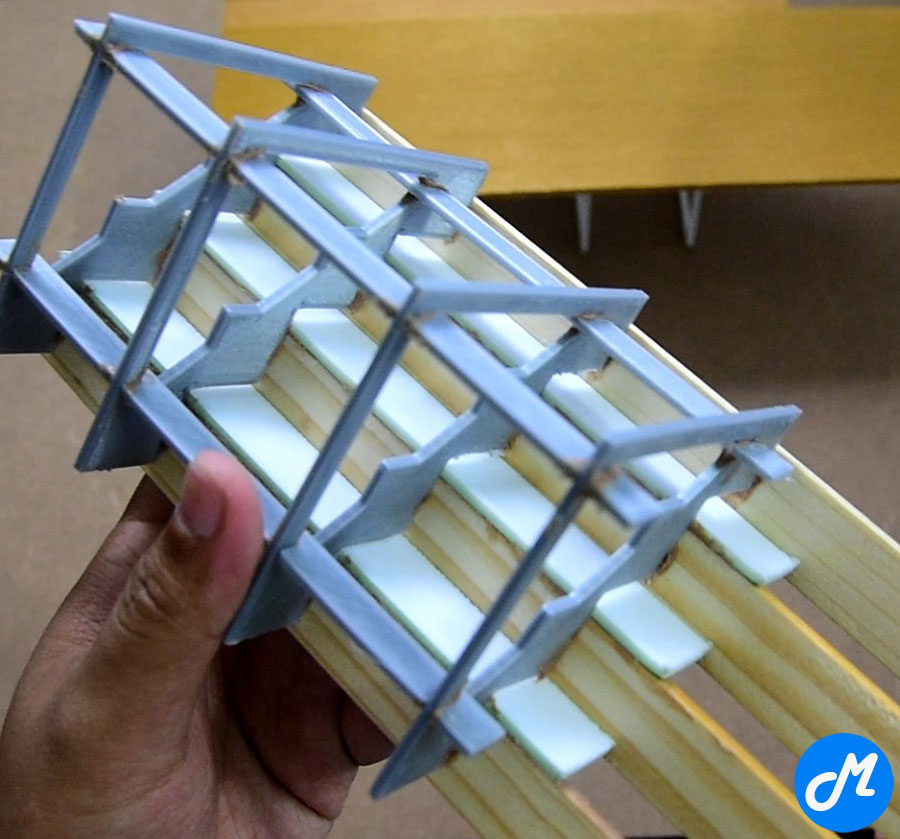

The green parts of the staircases were printed while the brown parts (surface) are actual wood. Other 3D printed parts are the window frames, more on this later. 🙂
The walls on this diorama are of foam board, carefully cut to match the other contents.
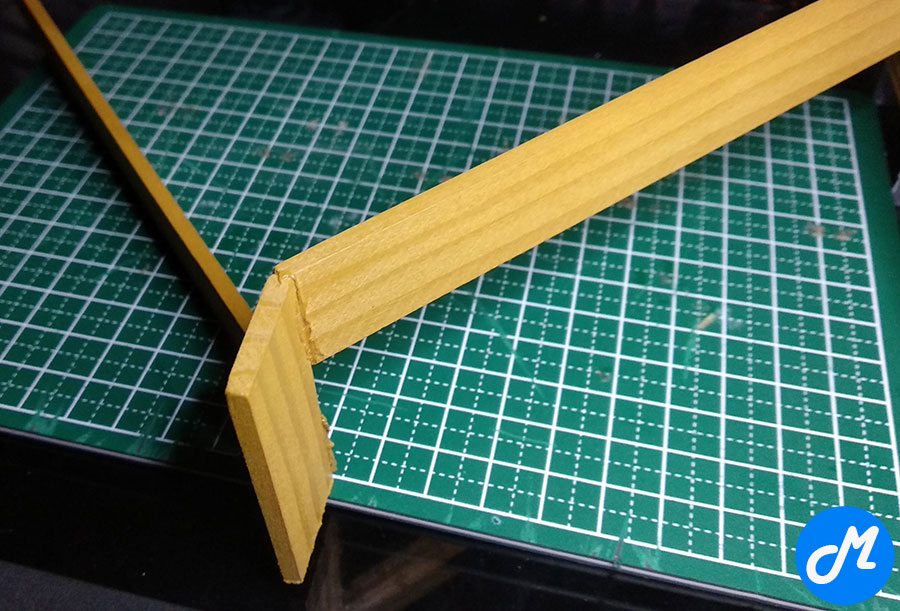
The steps on the stairs, the platform and the hand rail of the stair case are of wood. These pieces of wood were given color treatment, same goes to 3D printer parts like the window frame so all of them has an orange wood color.
The hand rail alone was a little tricky as I had to make sure they are properly angled during cutting process so they fix together in perfection.
At this point you should also realize the amount of effort put into getting the measurements correct, not just for piecing them together but also for the 3D printing as I had to design everything from scratch. 3D content libraries are plenty but the best way to get the output based on your exact requirement is by designing them yourself.
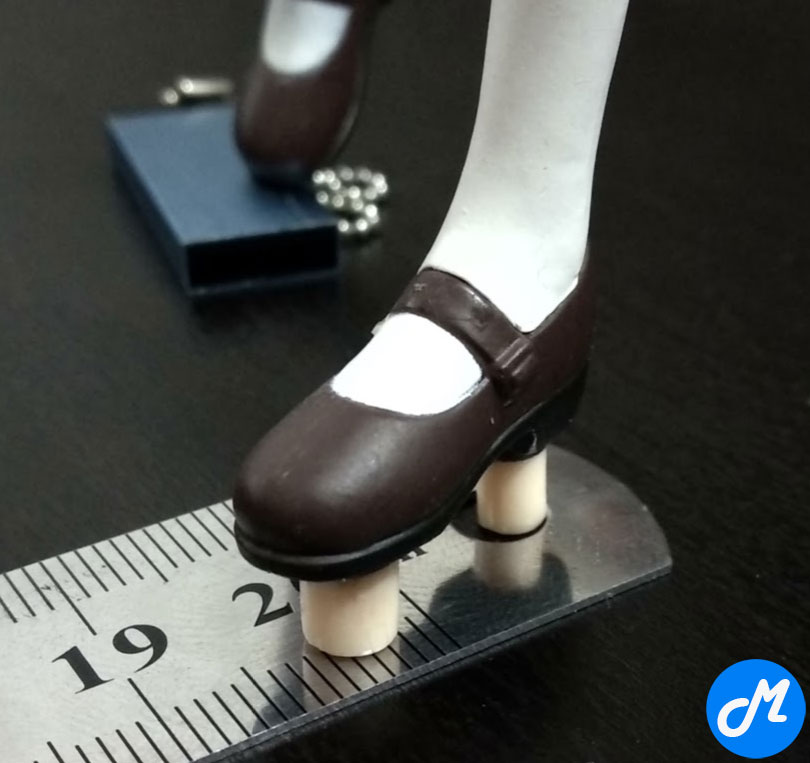
Some of you might be wondering, or noticed that she stands very well on this diorama and how did I get her to stand on the platform? After all every figure has some form of support, there’s usually at least one peg that’s either from the support base or from the figure. How on earth did I get Asuka to stand?
Let me tell you a story – one of her pegs broke but it was still hanging on her shoe, I didn’t realize it until I placed her on the table and noticed she could stand for some reason. Upon examination I realize one of the peg broke and is in a slightly bent position and she stood tall.
It was then I realize there is a possibility of making her stand so I removed all her pegs after carefully considering the possibilities. Once all the pegs are removed, I added a very thin piece of material under one of her shoes and that miraculously brought her to center of gravity to a position that she can support herself. 🙂 It’s a prize figure, I don’t mind cutting those pegs and after all she looks better without the support base. My only problem now is that she’ll topple if there’s a hard knock on the table.
Lighting
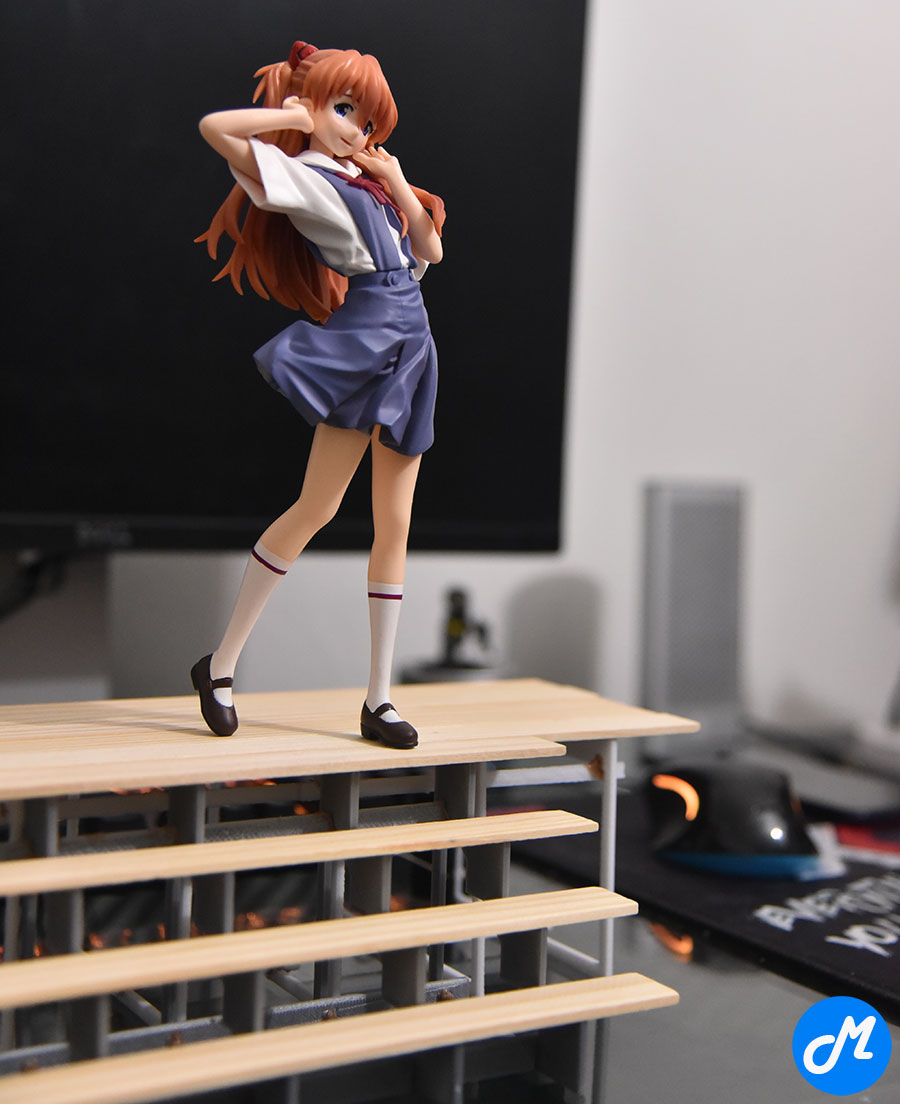
This part took me more than 2 weeks to plan. The diorama was completed even before the final week of April but the output seemed boring and I couldn’t get the lighting to work well, at least not at that point of time.
The same week that I completed the diorama was also the week I travelled to Taiwan for work, I stayed there for almost a week and my goodness never in my life have I spent so much time observing how light falls on subjects in various times of the day.
After coming back from Taiwan, I had another week of work to go before I had the time to work on photographing the diorama. It’s not a bad thing actually, I wasn’t satisfied with my diorama either.
The great breakthrough came about when I was watching Darling In The FranXX episode 16’s ending, it’s a new ending for this series and it the scene that gave me a the final bit of inspiration was this. 😀
![[HorribleSubs] Darling in the FranXX - 16 [1080p].mkv_snapshot_23.14_[2018.05.13_04.42.41]](https://moeness.com/wp-content/uploads/2018/05/HorribleSubs-Darling-in-the-FranXX-16-1080p.mkv_snapshot_23.14_2018.05.13_04.42.41.jpg)
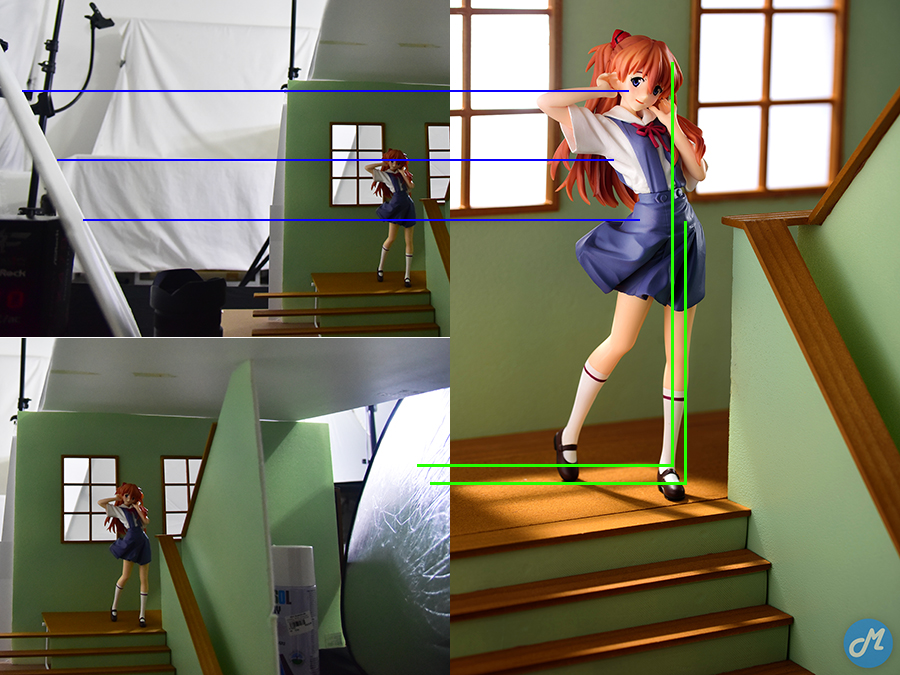
I went on to make an additional window frame and that was the key to getting the image balanced and with that I went on to work on the lighting. Here’s the image showing before and after, the original idea had only one window frame but that affects the composition a lot, going with dual window frame balanced the image.

Lighting itself was a challenge, the initial plan was to use steady lights (bulbs) to light the scene but try as I may I couldn’t get it the way I wanted. With my existing equipment and all my bulbs available, there’s no way they can be strong enough to simulate sunlight the way I wanted, let alone craft the scene.
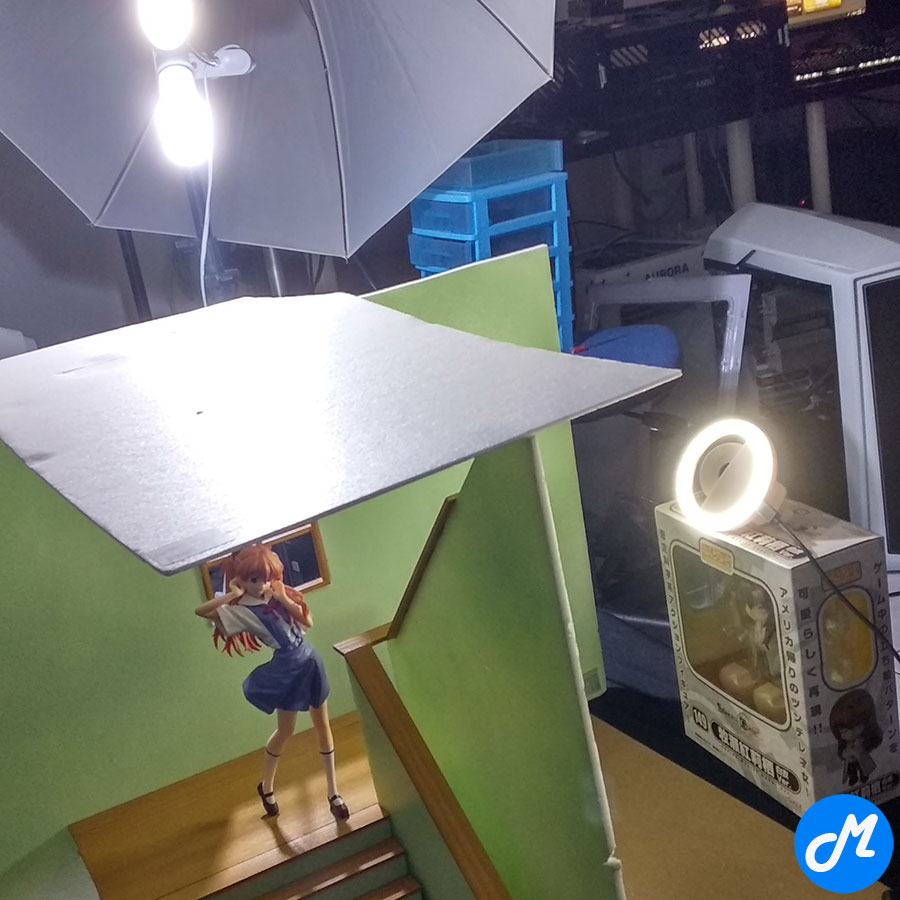
In the end I resorted to my flash units, remotely triggering 2 units. First unit being the main unit that’s placed very high up and has a small softbox on it to direct the light through the window and having the light fall on the steps at the stair case. This adds moods to the scene, it gives you an idea of the time of the day and it emphasizes the structure.
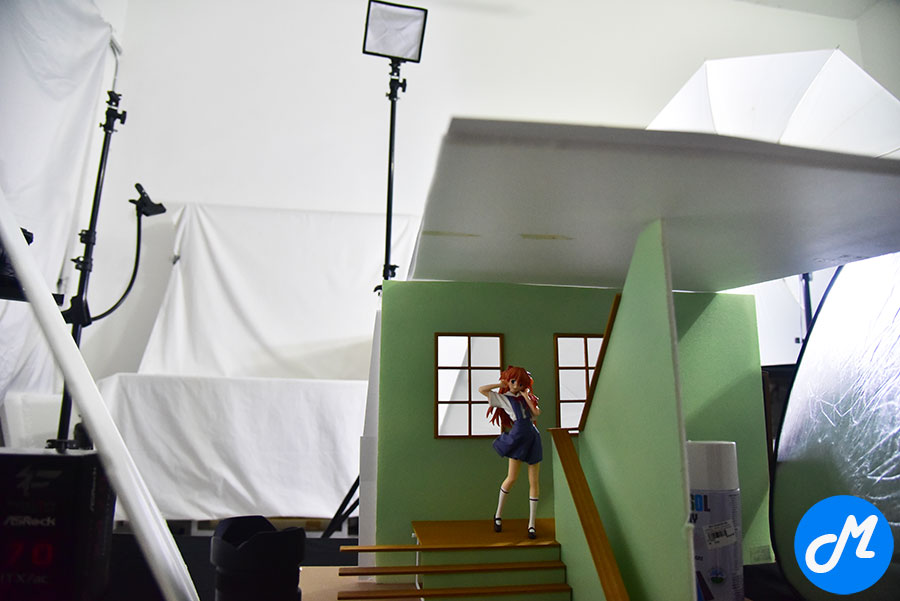
As for the window, initially I thought of having some trees at the background but my friend suggested the possibility of going with white – upon considering this, I’ve decided to go with white colored view outside the window as it’s less distracting,
The white area on the window was created by using my larger softbox and a flash unit that’s triggered by my camera system. With both flash triggered I now have 2 main source of light going through the window.
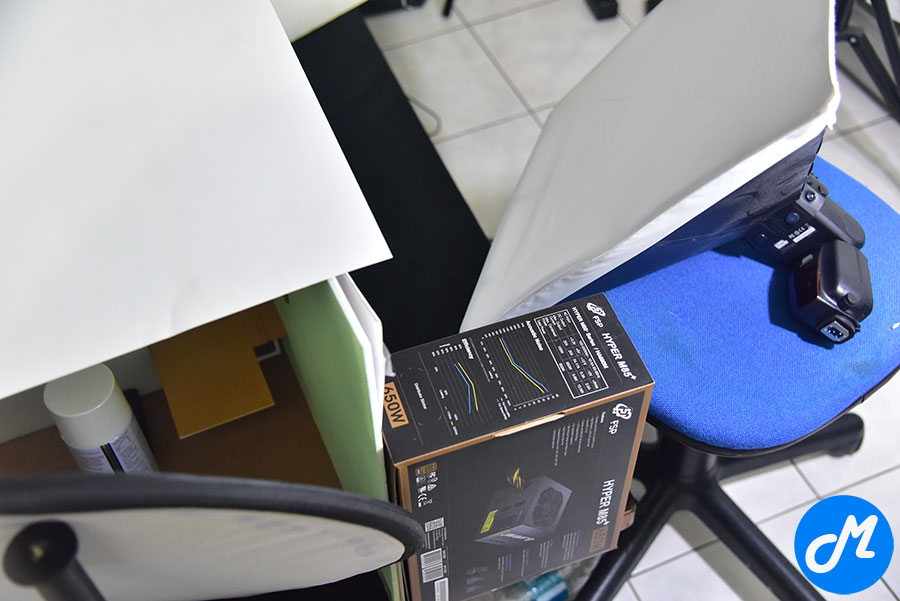
The walls were covered with paper so the flash doesn’t cast any form of light through it while the ceiling (yes, there is one) blocked the light from the flash from high-up.
To get more light into the scene I had one white reflected on the left and one silver reflector on the right. They cast light differently but they got the job done, both will reflect light from the flashes and land it on Asuka, sufficient to create enough shadows and highlights on her to enhance the tonality, thus giving her dimension and making her look as “human” as possible.
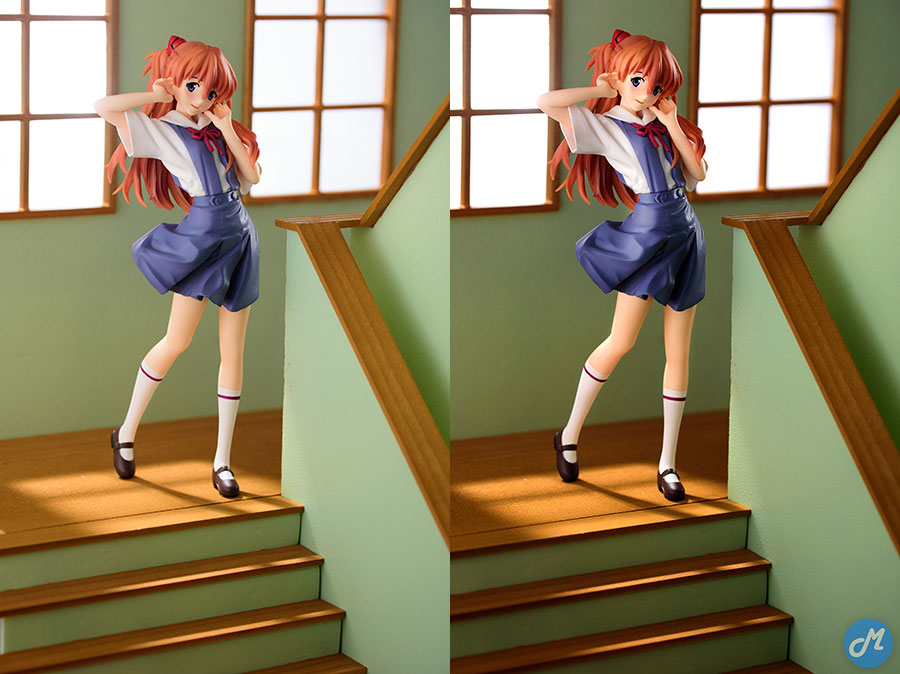
Post-processing was simple as I made it a point that my photos are correctly exposed, for this image the post processing was to darken the background to make the subject stand out.
Parting Thoughts
Phew, that’s such a lengthy tale told. I hope you enjoyed the article as much as I do writing it, and also sharing the whole sequence of production.
Creating this diorama wasn’t difficult but it took a lot of effort to calculate and craft, to me the challenging part is to decide on the composition and to get the lighting to perfection. I don’t believe in spending a lot of time on the computer just to tweak, getting it done right from the camera setting eliminates risks of being unable to fix during post.
Special thanks to my friend EXkurogane who suggested the color for the wall and use of white color for background on the window.
😀
Oh and lastly : Equipment setup : Nikon D750 + Tamron SP90 + 2x Pixel X800N Flash